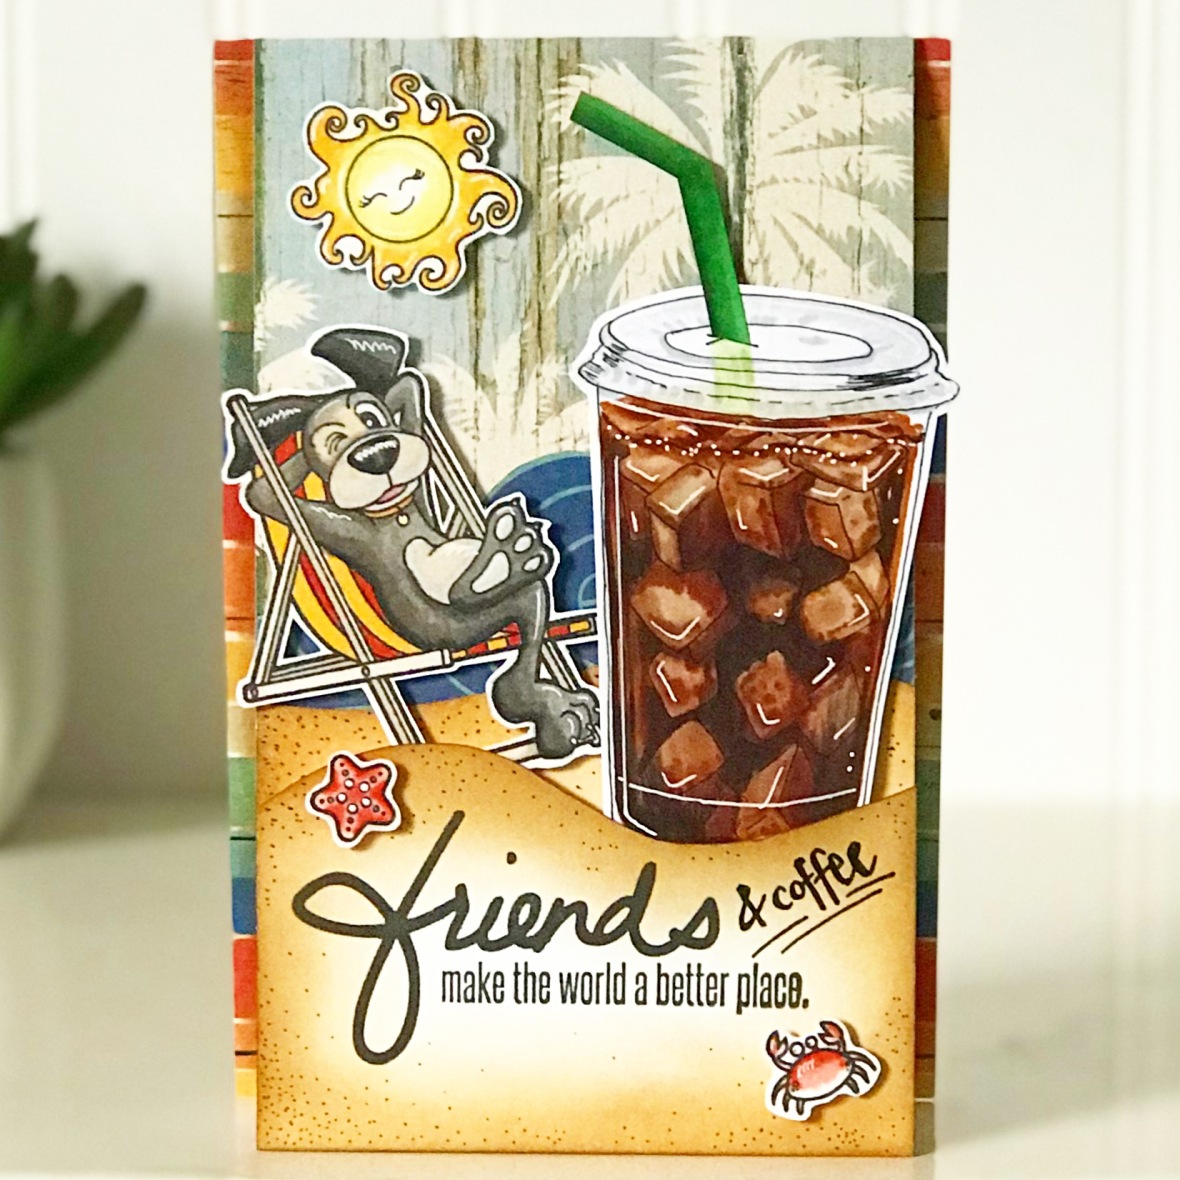
The challenge theme for this month at Little Acres Creations is SUMMER! and wouldn’t you know it? I JUST used the “Doggone Vacation” stamp set for the card I entered in the Coffee Lovers Spring/Summer Blog Hop, so I had to find something else to use. Which brings me to my first obstacle…
Obstacle #1: I want a cloud stencil!
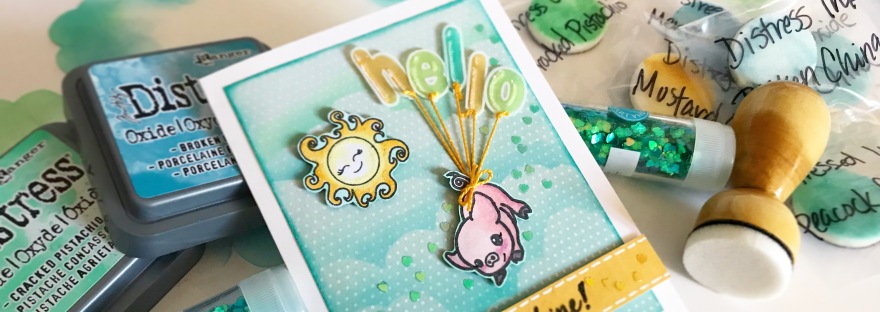
I wanted to use the Balloon Alphabet, the sun, and a piglet from Pigments of Imagination on a blue summer sky for the concept. I love the soft, dreamy clouds you get from brushing inks over a cloud stencil. It feels like everyone has a one but me. That’s probably not true, but feels true when you see so many people just whip one out of their stash in a video.
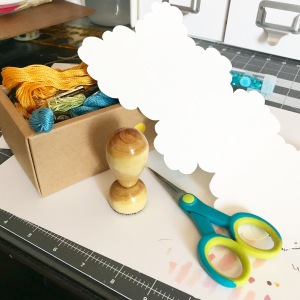 I’d already blown my budget for art supplies, but I had some sturdy card stock and a pair of scissors, so I took a deep breath and started snipping.
The hardest part of creating this stencil was not letting myself be too critical of the shape. I really surprised myself–it wasn’t bad at all!
If you’d like a copy of my cloud to use in your own projects, you can download it here —> free cloud stencil.
I thought I’d just make this to use until I could buy a real one, but now I don’t think I need to–I can spend my money on other things.
Obstacle #2: My blender foam is soaked in “Vintage Photo”
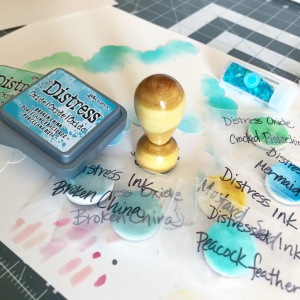 One of my pet peeves is the muddiness you get when you try to use the same blending foam on your blender with different colors. Now that my stencil is ready to go, my dilemma here is that I have ONE ink blender and a few different Distress Ink colors to choose from. I have a brand new package of blending foam refills, so see what I did here?
I grabbed some tiny ziploc bags out of my husband’s work station and used a sharpie to write the colors on them. I might wear out the velcro part of the foam by sticking them to and pulling them off the blender, but at least my colors will be crisp!
Vellum Balloons: Floaty balloons should look… airy
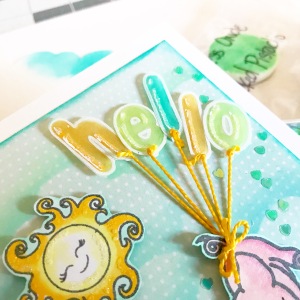 How to make balloons that look as light and dreamy as these fluffy clouds? Think think think! I feel like over half my project time is spent thinking and not really doing anything.
Because I really wanted a sheer balloon look, I opted for vellum. I don’t have any special vellum, just a package of inkjet vellum that I’ve probably had for 10 or more years. I couldn’t use my regular inks to stamp on it, because it just smeared or beaded on the surface. What worked for me was white Staz-On ink for the outline, and then I drew highlights onto each balloon letter with a Sakura glue pen.
The cool thing about this glue pen is that it writes in blue, then dries clear. After drawing the highlights, I sprinkled some Sparkle Embossing Powder on it to get a bit of twinkle and heated it carefully so I wouldn’t char the glue.
A little Copic color on the back (light in the middle and bold on the edges), and they’re perfect! They look like jellybeans! I could have chosen some twine or black string to tie them to the piglet, but this marigold yellow is much more summery!
Obstacle #3: Where’s my Jewel Picker??
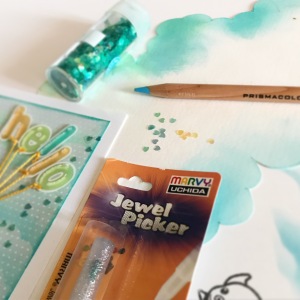
I knew I’d ordered one… but I couldn’t find it. Maybe I only THOUGHT I’d ordered it, and I’d left it in an abandoned shopping cart with a bunch of other crafting supplies in some online bit of shopping heaven.
Whatever the case, my fingers are far too fat to manipulate the heart glitters the way I wanted. I vaguely remembered a YouTube video mentioning that you could use a grease pencil or something similar to pick up small sequins, so I dug out my Prismacolor Pencils and used the waxy tip to poke at and lift up individual sparkles so I could position them accurately on my card. I felt incredibly clever. Of course the moment I finished my card, Candy the mail lady delivered a package containing my recently ordered… you guessed it–Marvy Uchida Jewel Picker!
The Flyaway Piglet–Don’t call 911!
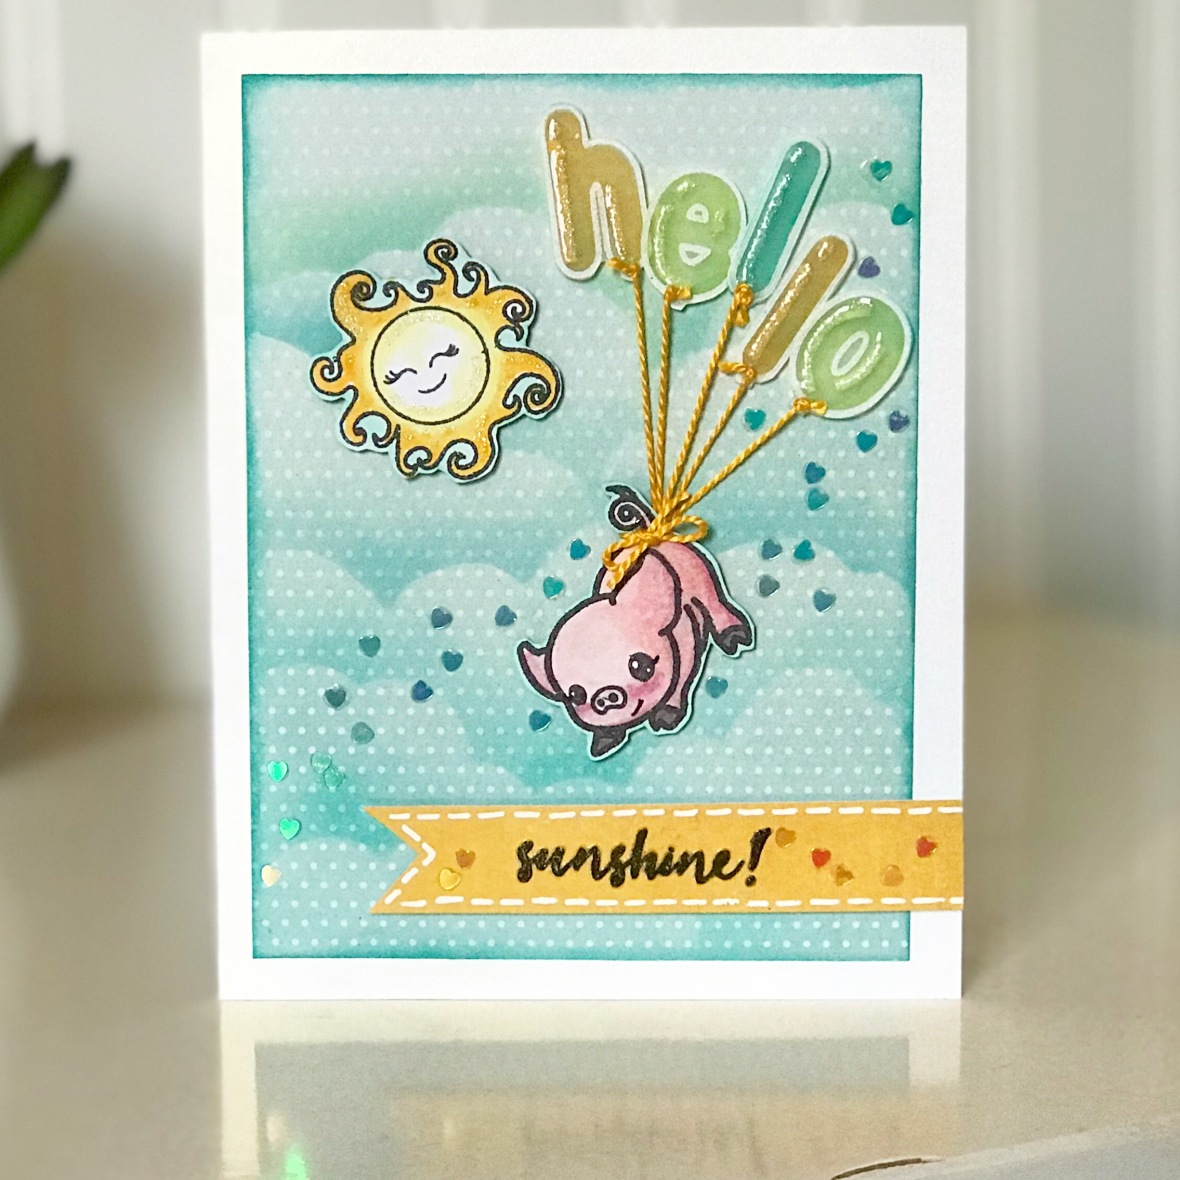 If a real piglet were being lifted into the sky by the tail, watching the earth recede as it floated ever higher, it would be terrified! No piglets were abused in the making of my “Hello Sunshine” card, I promise. But I did have to play with this piglet’s expression so it was floating up gently to greet a happy sun because it wanted to, instead of looking like it was hurtling into space to burn in the atmosphere. All it took was a micron pen to draw a tiny little smile and a couple of lashes to soften the eyes and create our cheery little ham!
Now that my write up is done, I can finally submit this card for the challenge! I hope you can create a little something, too. Read more about the June/July Little Acres Creations Challenge here.